Working With Images in p5.js
Objectives and Overview
Lesson Objectives
Images in p5.js
While you’ve been drawing onto an HTML canvas for the majority of this course, p5 has some powerful tools for loading and manipulating external media such as images. This lesson introduces these tools and provides some ideas for how you can start integrating them into your sketches.
Loading Images in p5.js
One issue with using images instead of drawing onto the canvas is that you need to wait until the image loads into your sketch. Luckily, p5 has a fix to this issue in the preload function. This is an entirely new function that you’ll be creating, so if you need a review on functions make sure to revisit both functions lesson part one and functions lesson part two. Let’s take a look!
The preload() Function
Throughout the course, you’ve primarily worked with the built-in setup() and draw() functions. P5 has other built-in structural functions that are helpful. For example, you may also have experimented with the mousePressed() function when creating interactive sketches. Another one of these structural functions is called preload(). Much like setup(), preload() runs one time and executes any code contained inside.
Why preload()?
Preload is essential when working with media files such as images and audio in your sketches. This lesson covers images, but you’d use the same process for loading audio files. As always, you’re encouraged to read the p5 reference manual entry on preload.
JavaScript is what’s known as asynchronous. This means that parts of the code will run without waiting for others to finish unless specifically told to behave otherwise. If you write code that interacts with an image, JavaScript will run that code before the image loads! This is one of the strengths of JavaScript, but can also cause issues when working with files that need to be loaded. For this reason, preload is required to make sure that p5 has all the assets loaded before running the rest of your sketch.
P5 supports standard image formats such as .jpg, .gif, .png, and .svg. Make sure to consider the size of the image you use because larger files take longer to load!
Using preload()
There are two parts to this process. First, you need to put the image into your project folder. Once the image is inside your project folder you can write the preload() code. Let’s start by loading the image into the project folder in the web editor.
Make sure that you know the location and name of your image. This example uses one named galaxy.jpg and it’s saved on the desktop. The p5 web editor doesn’t support drag and drop, so you’ll need to add the file to the project folder another way.
Loading the Image
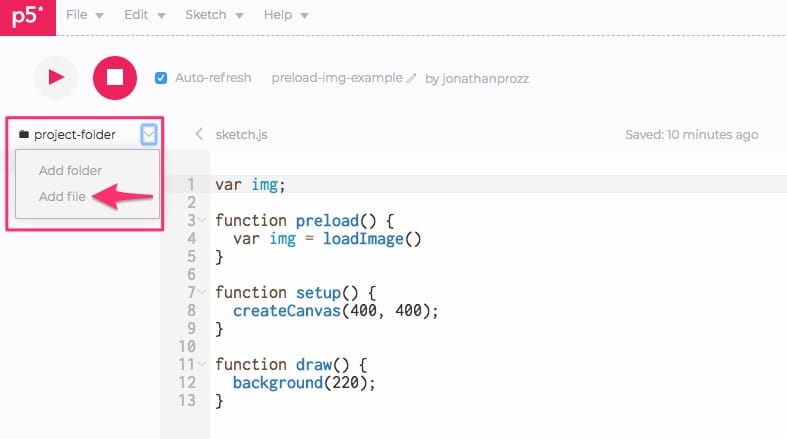
First, you need to reveal the project folder tree in the editor. Click on the arrow on the left side under the play button:

The project-folder tree is now revealed! There is a downward-facing arrow next to the project folder. Click this to reveal options for adding files and folders. The dropdown menu has two options: Add folder and Add file. Click on Add file to bring up a file browser:
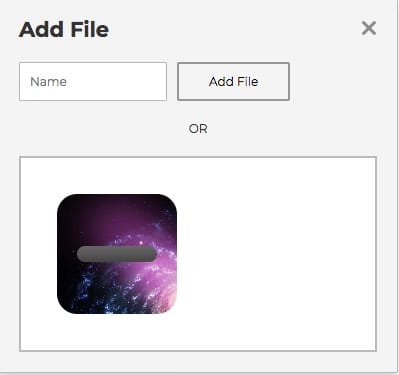
Once you’ve clicked Add file you can type the filename or drag and drop your file into the box. Once your file loads, you can close this window.
Your file is now added to your project folder and should show up in the navigation tree:

Once you’ve confirmed that your image is in the project folder, you can move on to the next phase!
Writing the preload() Code
Now that the image is loaded into your project folder you’re able to load it into your sketch. This is where you’ll use the preload() function.
The first step is to create a global variable as a placeholder. You can name it something such as “img” – it doesn’t matter as long as you’re consistent throughout the sketch. The variable can be empty at this point: let img;
Next, create the preload() function. This can go anywhere outside of setup() and draw(). Since preload() is a special function contained in p5 you need to make sure it’s spelled correctly. Here’s the code so far:
let img;
function preload() {
}
function setup() {
createCanvas(400, 400);
}
function draw() {
background(220);
}Code language: JavaScript (javascript)Notice that the preload() function is outside of setup() and draw().
This is the skeleton of the sketch. Now let’s write the actual preload() code!
The preload() Function Body
This is where the actual code goes. Make sure that you’re putting the code inside the preload() function or it won’t work. You’ll be using p5’s loadImage() function to load your image into the global variable you created:
let img;

function preload() {
	loadImage('galaxy.jpg'); //the name of your image as a string
}Code language: JavaScript (javascript)
The loadImage() function takes the image name as a string. Make sure that your image name matches the image you added to the project folder and that you surround it with single or double quotes.
Next, you need to display the image. This is done by using the p5 image() function. This function takes three parameters: the variable holding the image, the x-coordinate of the top left corner, and the y-coordinate of the top left corner of the image. The x and y coordinates are used to position the image on the canvas. Here’s an example of what the whole sketch code looks like:
let img;

function preload() {
  img = loadImage('galaxy.jpg');
}

function setup() {
  createCanvas(400, 400);
}

function draw() {
  background(220);
  image(img, 0, 0);
}Code language: JavaScript (javascript)
This produces the following sketch:

Note: The above image uses var instead of let – for the purposes of this example, the output is the same.
The image is drawn with its top-left corner at the origin, since 0, 0 were passed in as the x and y coordinates. Play around with the placement and see what you can do!
The image() function also receives two optional parameters, which are the height and width. You would pass these in after the variable, x coordinate, and y coordinate. Go ahead and try this out!
Next Steps
You may now be asking what’s next after loading an image into your sketch. P5 has several functions that you can experiment with. Check out the p5 reference manual. There are several image and pixel manipulation functions available in the Image category about halfway down the main page.