3D Design for 3D Printing
Objectives and Overview
We’ve already covered how 3D Design is different from 2D design, but 3D design for 3D printing is also very different from 3D design for graphics. There are a few key concepts you need to consider when you are designing objects that you plan to 3D print.
Lesson Objectives
- Understand specific considerations for 3D design for 3D printing
Designing for the Real World
Designing for 3D printing is very different than designing for a game. When you are creating objects for a game, you can ignore reality if you choose to. You don’t have to consider things like gravity in a digital world. However, in the real world, where you will be printing physical copies of your digital file, you definitely cannot ignore reality (especially gravity).
When you are designing an object that is going to be created in real life, you need to take into consideration a few core concepts that may affect your design and will definitely affect your prints. When designing objects that will be 3D printed, follow these tips for good design.
How is 3D Designing Different From 2D?
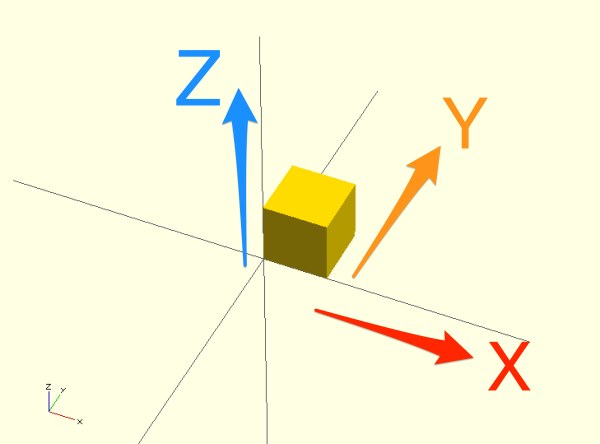
This may sound obvious but the most significant difference is the addition of the 3rd dimension.
When you draw on a piece of paper, you are working in a 2D space. That is, you can move your pen left and right, and you can move your pen forward and backward on the paper.
Typically, we say that “left and right” movements are along the “X” axis. Forward and backward movements are along the “Y” axis. This should be familiar to you if you have taken algebra classes.

When you design in 3D, we had a third dimension. This dimension would be if you lifted your pen up and down off the surface of the paper. We call this vertical lift, the “Z” axis.
Three Tips for Successful 3D Printing
Moving from 2D to 3D design can be a difficult transition at first, but you’ll develop a workflow as you continue to practice your 3D design skills. Here are three tips that will help you be a successful 3D designer and printer.
Rotate the Workspace
When you are working in a 3D world, it’s important to rotate your view often to make sure that things are where you think they should be. Because our screens are only 2D, you have to rotate the workspace in your 3D Design tool to make sure that all the surfaces are lining up.
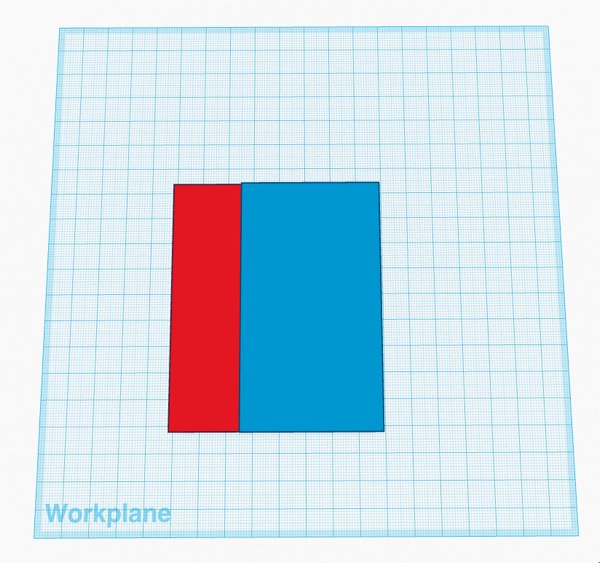
For instance, in the workspace below, it appears as though the red cube and blue cube are perfectly lined up.
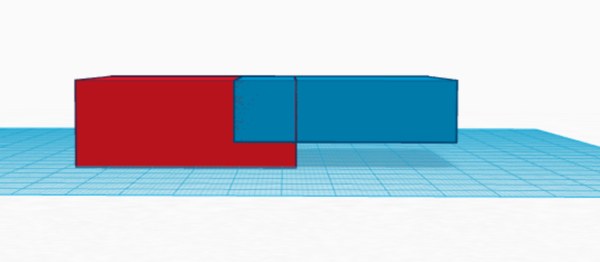
If you rotate the workspace, you can see that the blue cube is raised slightly on the Z axis and the bottoms do not line up. This is a very simple example but the more complex the design, the more likely that issues will arise from not rotating the view.
Bottom Up Design
Designers that are new to working with the intention of 3D printing often ask the same question that several youth ask: How is designing for 3D printing different than designing for 3D gaming? This is a valuable and common question, and here is an overview of the difference:
A lot of the same tools that are used for designing objects 3D games, can also be used for designing objects for 3D printing but there are some things you need to consider before you bring one of these designs to life on a 3D printer.
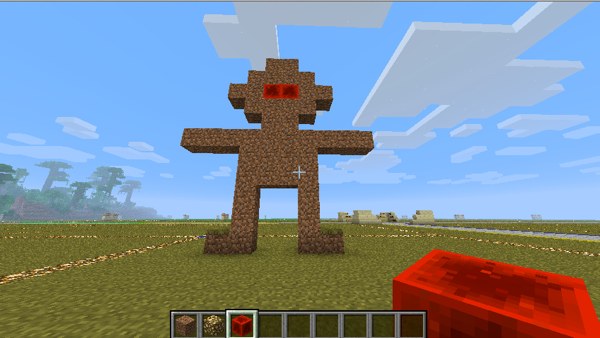
Bottom Up
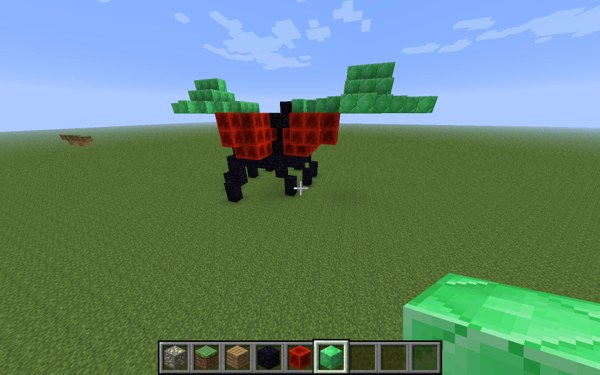
In 3D game design, gravity can be turned off while an object is placed in the game world and then held in a certain spot. In Minecraft, you could create a floating platform because gravity is turned off for those blocks.
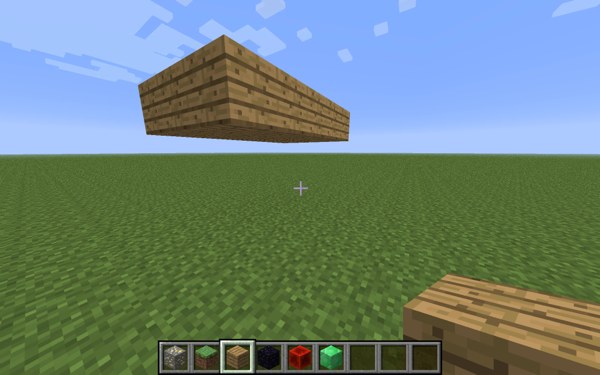
A 3D printer, on the other hand, can not turn off gravity. It starts by printing the bottom of the object and then slowly adds layers on top of the bottom layer to build up your object. A structure like the one in the Minecraft image above would not be possible unless we lowered it to the platform. The image above is an obvious (and un-useful) example but let us take a look at some other examples that may be less obvious and more likely to be 3D printed.
This creature would be very difficult to print because the overhang on the green wings would not have any supports.
Floating Object Check
It’s important when you are evaluating whether or not a design is actually ready for printing to check for floating objects in your design. You can easily do this by rotating the workspace and your design and examining from all angles.
This design looks great from the top down:
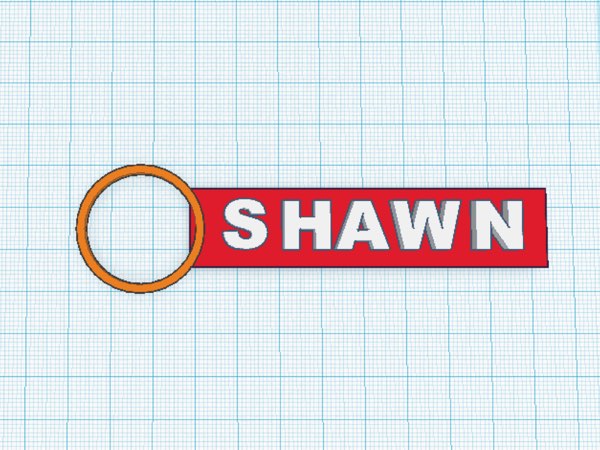
It even looks pretty good as you begin to rotate around to the side:
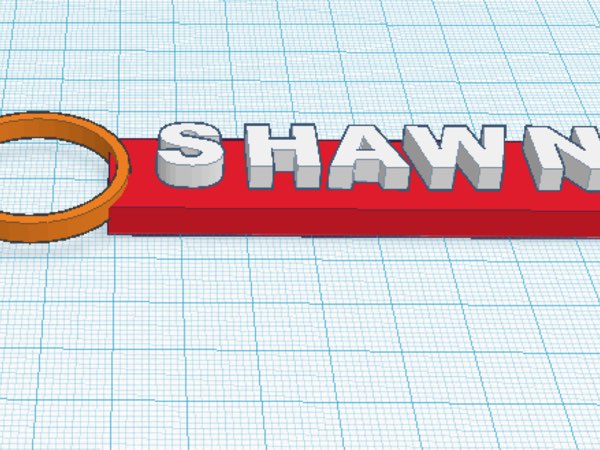
However, once you look at the side view, you can see that all of the letters are floating and not actually attached to the keychain base. If you were to print this design as is, the letters would not print and you would end up with a blank keychain.
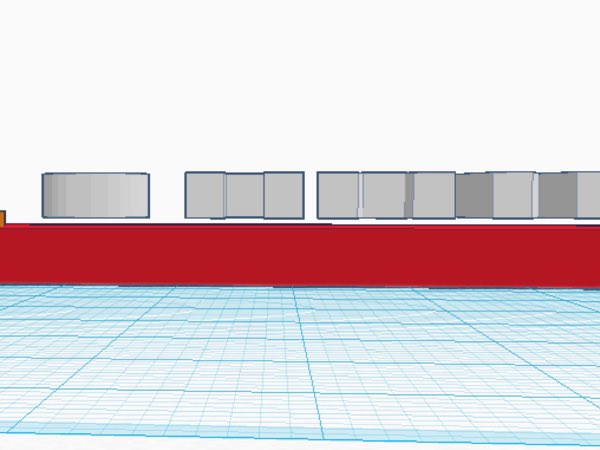
This is the exact reason that we rotate the workspace and look at our designs from all angles before printing.
Overhang Issues
This video demonstrates what happens when you print an object with too much overhang and gravity takes over.
Here is what the design looks like on the screen:
Here is the video demonstrating what will happen to this particular design if it is sent to a 3D printer:
