Fusion 360: Introduction
Objectives and Overview
This lesson introduces the Fusion 360, a design tool that you’ll use throughout the rest of this course. We will go over different aspects of software
Lesson Objectives
- Basic understanding of Fusion 360
- Navigate through the user interface of Fusion 360
What is Fusion 360?
Fusion 360 is made by Autodesk, it is a cloud-based CAD/CAM tool for collaborative product development that combines industrial design, mechanical engineering, and machine tool programming into one software solution. It is the next level up from Tinkercad, another product of Autodesk. Recent updates have made the transition from Tinkercad to Fusion a bit smoother. With that being said, Fusion 360 is still a much more powerful tool then Tinkercad with different elements that aren’t included with Tinkercad. Patience is key in this transition, also be sure to look over all the additional resources shared throughout this course.
Downloading Fusion 360
Go to this link to download Fusion 360: dhf.io/getfusion. Follow the instructions listed on site to get the free education license. Note: You won’t need to create a new account; your Tinkercad login should work.

Make sure you have the latest update of Fusion 360 if you already have it installed.
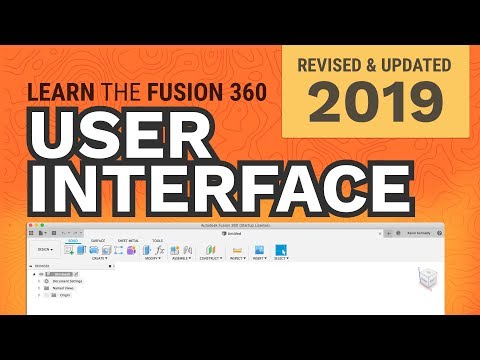
Getting Started: User Interface Overview
When you open Fusion 360, your screen will automatically start a new, blank file. From here, you have a lot of options to explore.

If you create a new or different file, you can navigate to the File icon in the top left corner and select New Design. This will open a new design tab.

You can also use the Data Panel to create a new project as well as uploading models and managing past projects.

Always remember to save your design before closing out the program, the auto-save doesn’t work consistently so don’t rely on that! If you upload your files to the cloud, you can access them remotely or invite other users to collaborate on the design.

Workspaces
As mentioned before, Fusion 360 is a powerful program and it’s the first of its kind software that provides design tools for CAD, CAM, CAE in one platform.

It incorporates six distinct workspaces:
- Model: create and edit solid geometry
- Generative Design: create and edit design by inputting requirements based constraints (weight, stress, material cost, etc)
- Render: generate realistic renderings of the design
- Animation: create animations of how the design should work
- Simulation: perform stress analysis to determine how loads lead to deformation and failure, helping you understand if and how the part will fail
- Manufacture: generate tool-path strategies for the design to get fabricated
We will be solely working in the Model workspace throughout this course but feel free to explore the other workspaces on your own time.
Common Tools Within the Model Workspace
Below is just an overview of some common tools that you’ll use within the Model Workspace but there are many more as you explore designing in Fusion.
Sketch Tools
When you’re looking to create a 3-dimensional form, you’ll most likely start with a 2-dimensional sketch. You’ll use Sketch tools for the first part of this process. Within this toolbar, you can create a range of closed shapes as well as open lines and splines. Additionally, you’ll find tools to modify existing 2D geometry.

Sketch Plane – Consider the sketch plane is a piece of paper that you draw on; You’ll always be building on a plane in Fusion just like with the workplace in Tinkercad. With Fusion, you’re given three preset planes to choose from XZ, XY, YZ. You’ll most likely always begin sketch on the XZ Plane.

Line – The tool will be used a lot when designing in Fusion. It is one of the more simpler functions but is a valuable tool in the design process. A common use of line segments is to make construction marks, lines that are used as reference that don’t affect the shape or surface of an object which will go over in a later project.

Rectangle – With the rectangle tool you can create both squares and rectangles. Fusion gives you a few different methods of creating a rectangle(2 Point Rectangle,Center Rectangle and 3 Point Rectangle).

- 2 point rectangle – This one allows you to choose the point of the top left corner and the bottom right corner. This is best if you want the rectangle to begin and/or end in a specific place.
- Center rectangle – This one allows you to choose the center point of the rectangle and the width and height expand from that point. This is best if you need the center of the rectangle to be in a specific place.
- 3 point rectangle – This one allows you to choose the point of the top left and bottom left corner and the width of the rectangle. This is best if you need to make an angled rectangle.
Pattern – The pattern function allows you to duplicate an element to a sketch, body, or feature along the surface of a separate body or component. This has proven to be a time saver when designing something that features identical bodies.
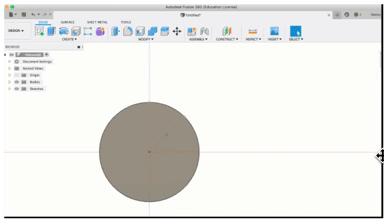
Circle – The circle tool will always allow you to create a perfect circle.
- Center point circle – This one works exactly like the center point rectangle. Again, this is best if you need the center of the circle in a particular place.
- 2 tangent circle – This one allows you to specify two lines that you would like your circle to be tangent to and then to choose the size from there. You would use this if your circle needed to touch the sides of a square, for example.
Create Tools
You’ll use the Create tools to complete this 2D to 3D transformation. Here you’ll find your standard Extrude, Revolve, Sweep, and Loft tools. You’ll also find more specialized commands that are worth exploring independently.
Extrude – The extrude function will add depth to any closed sketch. You can add height by adding a positive measurement or cut away from an object by applying negative measurements.

The Revolve and Sweep functions provide similar outputs by allowing you to create unique shapes along a particular path that would be impossible to create without these functions. The Revolve will take your sketch and extrude it on a cylindrical angle. You can make something cool like a vase using the revolve tool. The sweep tool involves creating a sketch that utilizes two axes to create a sketch profile and a line path. The sweep tool will help you make things like pipes and cables.
Revolve:

Sweep:

Loft – This is a great tool for creating organic shapes through a transition between two or more sketch profiles or faces. A practical use for using this tool is designing an air duct or fancy vases.

Modify Tools
The Modify tools work similarly to the Create tools discussed previously. They primarily function as they are named: to modify existing geometry.
For instance, you’ll find the Press Pull tool, which functions similarly to the Extrude tool (inside the Create menu), and Chamfer/Fillet toolsPerhaps most importantly, you’ll find the Move/Copy tool within this menu. This is one of those features that will feel very familiar and intuitive if you’ve used other Autodesk tools (Tinkercad, 123D Design)
Assemble Tools
The tools within the Assemble menu will help you create more complex connections between parts of your design. This is more of an advanced tool, you may not use many of these features, but it can still be useful to explore.
The Component command and the Joint command are useful features for making assemblies. Components are used to design models that require movement, using a component will allow you to simulate movement within the Fusion. Joints are used to create something that needs a moveable hinge like a door handle or pedal.

Construct Tools
The commands within the Construct menu are used creating and/or modifying geometry to an object. You’ll mostly like to use this if you need to add a new plane or an axis to a surface. An example would be adding a planar(flat) face to an object that doesn’t have one like a cylinder to build onto. Similar to using the workplane tool in Tinkercad.

With Inspect,you can inspect and evaluate different aspects of your design. You’ll probably use the Measure and Interference tools more frequently than the others. The Measure tool allows to measure between two reference points on a model. The Interference tool is a more advanced tool that detects interference between components or bodies.


Importing and Exporting in Fusion 360
Using the Insert command allows you to import other files into Fusion. You can import 2D files like Canvas, SVG or DXF; or import 3D models as a Mesh or something that is cool is importing parts from McMaster-Carr like screws or washers.

It’s useful to insert 2D files to use as a reference when designing. Here’s an example from a previous Print Shop design job; we were tasked with designing awards that resembled certain animals native to Maryland.

One of the animals we used was the Blue Heron and by using the Canvas command, it allowed us to import a sketch of one for reference. We then sketched on top of the image with the sketch tool using various different lines and arcs.

To export a file for 3D printing, you’ll use the Make command that is now located in the ‘Tools’ section.

Click Make and then 3D Print

When you click 3D Print, a browser will appear on the side of the screen like this:

There are two ways you can export, you can export it as an STL and store it on your computer or have Fusion upload directly into a slicer of your choice like FlashPrint.
To export as an STL: Select the object(s) and it’ll turn blue indicating that it’s selected. If design is made from multiple bodies that aren’t grouped together you can hold right-click drag across the all bodies to select it. Then click ok and choose what folder you want to store the exported file.

To upload as an STL into Slicer: Select the object(s) you want exported. Instead of clicking ‘Ok’ in the browser right away, you’re going to click the Output dropdown tab check the box Send to 3D Print Utility. Then select Custom and select FlashPrint. Then click ‘Ok’ in the browser and the model should open in FlashPrint.